
You bought or inherited a 40-year-old Honda GB250 Clubman, split the top end, and only then found out the timing marks were never recorded. The cams are out, the chain is loose, and nothing on the engine tells you where “zero” was. This is the exact bind that has no good answer online for the RFVC engine specifically. Here is how to set valve timing from a known-good reference instead of a lost one.
The method works because cam timing does not actually depend on the factory paint marks. It depends on one fixed relationship: piston at top dead centre on the compression stroke, with the cam lobes in their correct rotational position. If you can confirm TDC-compression yourself, you can rebuild the timing without the original marks, and you can even make your own marks that are as valid as the factory’s.
One honesty note up front. This is the general DOHC single-cylinder method applied to the RFVC engine, plus the RFVC-specific quirks that matter. Exact factory mark nomenclature, chain roller counts, and torque figures need the real Honda shop manual. Those spots are tagged below so a mechanic knows precisely what to confirm before final assembly.
The 5-step sequence (read this first)
If you are mid-rebuild with grease on your hands, this is the shape of the whole job:
- Find TDC on the compression stroke. Rotate the crank until the flywheel/rotor “T” mark lines up with the case index, then confirm both valves are closed (compression, not exhaust).
- Set the cam lobe orientation. With the piston at TDC-compression, the intake and exhaust lobes point away from their valves so both valves stay shut.
- Engage the chain and idler correctly. Fit the camshafts and lay the cam chain over the sprockets and the idler gear so nothing rotates while you seat it, keeping all slack on the tensioner side.
- Verify your marks over 2 full crank revolutions. Rotate the engine by hand twice, watching that the piston returns to TDC exactly as the cam marks return to their reference. Any drift means a tooth is off.
- Fit the tensioner last. Only after two clean rotations confirm alignment do you install and release the cam chain tensioner permanently.
Everything below is the detail behind those five steps, plus the recovery method for when the marks are gone.
What makes RFVC cam timing different from a plain DOHC single?
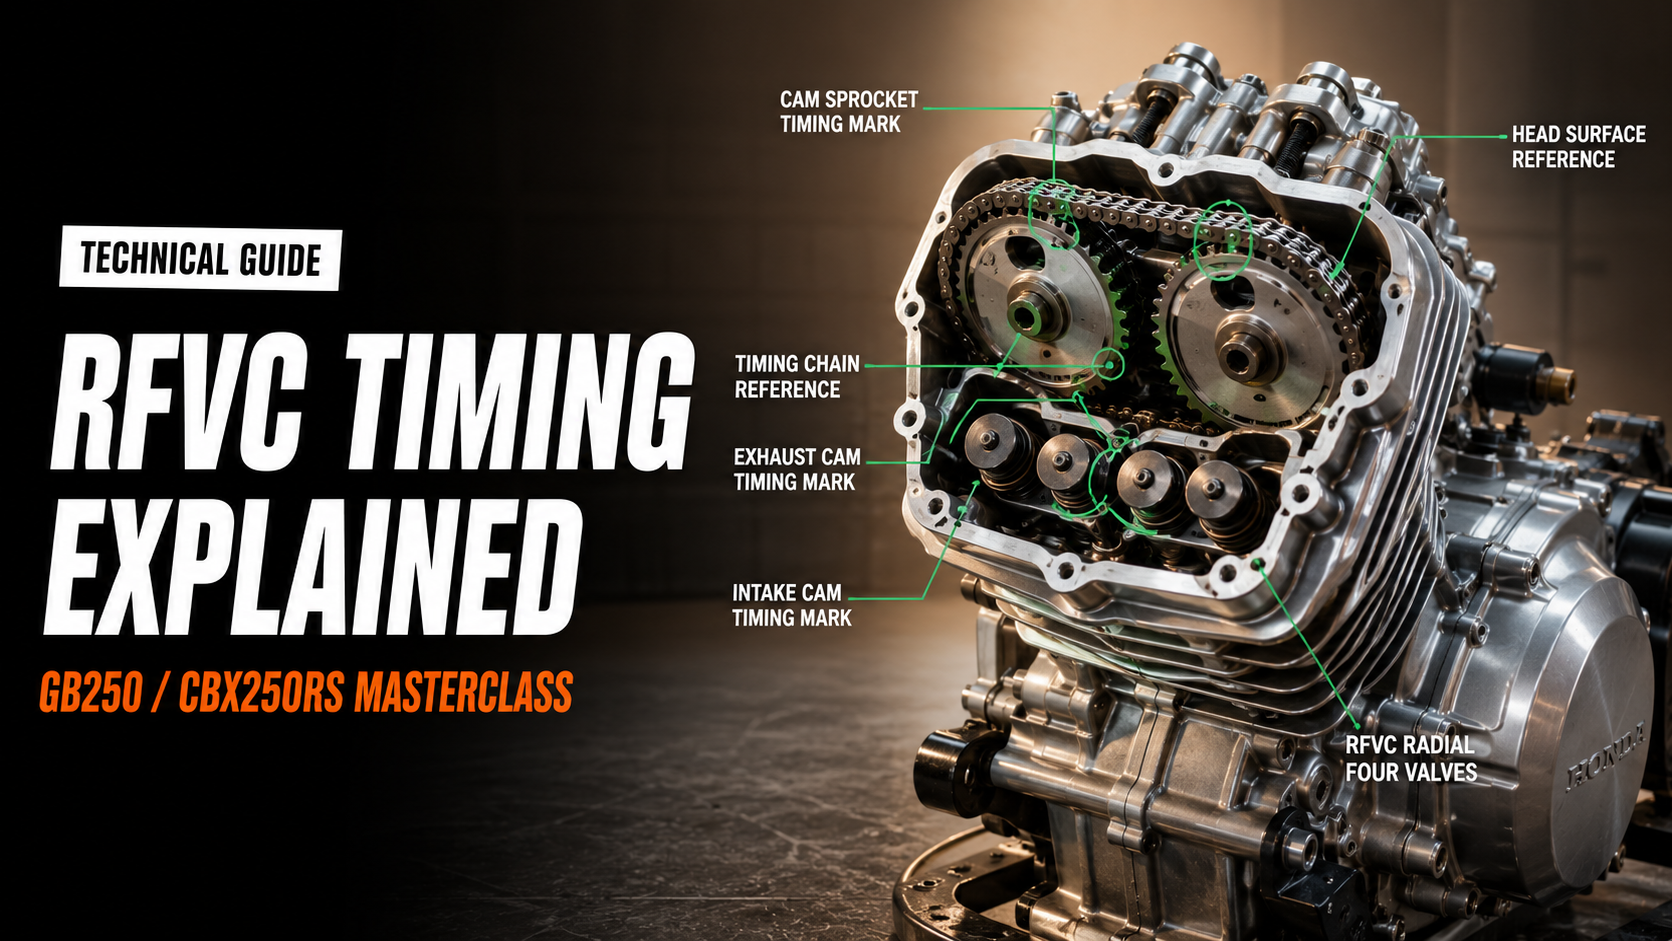
The Honda RFVC engine does not run the cam chain straight onto both camshaft sprockets. RFVC stands for Radial Four Valve Combustion chamber: the two intake and two exhaust valves splay out radially in a shallow pent-roof head, which is what gives the engine its high compression and its distinctive wide valve angle. To drive two camshafts in that layout, Honda used a cam-chain-plus-gear arrangement rather than a simple chain-to-both-sprockets loop.
On this engine the cam chain drives an idler (intermediate) shaft, and that idler is geared to the two camshafts, with an anti-backlash sub gear on the drive to kill the lash and quiet the top end.
Why this matters for timing: the reference you trust is the relationship between the crank and the camshafts, not the chain path in isolation. If the idler and sub gear sit between the chain and the cams, a mark on the chain sprocket alone can mislead you. You verify against cam lobe position and the flywheel TDC mark, and you treat any chain-link count as a secondary check, not the primary one.
The engine lineage is worth stating in full for context, because parts and procedures cross over. The RFVC single began as an off-road unit in the Honda XR350R, was adapted into the road-going Honda CBX250RS (a DOHC RFVC 250 rated around 30 PS), and then carried into the Honda GB250 Clubman from late 1983. Same basic top-end architecture across all three.
Step 1: Find TDC on the compression stroke, before you touch the cams
Rotate the crankshaft until the “T” mark on the flywheel or rotor aligns with the fixed index mark on the crankcase. That gives you top dead centre. On a four-stroke single, TDC happens twice per full four-stroke cycle: once on compression and once on exhaust. The mark alone cannot tell them apart.
To confirm you are on compression, check that both valves are fully closed and there is no lift on any lobe. If the head is still assembled, feel for compression resistance at the spark plug hole as you approach TDC, or watch for the intake having just closed. On the exhaust TDC, one cam will be on the overlap ramp and a valve will be cracked open. Compression TDC is the “safe zero” where nothing is under load.
This is the single detail that generic “how to time an engine” guides skip, and it is the one that ruins a rebuild. Time the cams to exhaust TDC by mistake and you are 360 crank degrees out. The engine may still bar over, but it will not run, and on a tight-clearance head you risk valve contact when you rotate it.
Step 2: If the original marks are gone, make your own from confirmed TDC
With the piston held at confirmed TDC-compression, mark the camshaft-to-head relationship yourself with paint or a scribe before you remove anything. This is the recovery method for an engine that was apart before you got it and carries no readable factory marks. It costs nothing, it is reversible, and it captures the correct timing at the one moment you can trust it.
Do it in this order, working slowly:
- Bar the crank to TDC and confirm compression stroke (Step 1). Leave it there. Do not let the crank move for the rest of this process.
- On each camshaft, find a fixed, repeatable reference: the flat face of a sprocket, a cast rib on the cam cap, or the head’s top gasket surface. Pick features that will still exist after cleaning.
- With a paint pen, put a witness mark on each cam sprocket and carry the line straight onto the adjacent fixed head feature, so the two align only at this exact position.
- Photograph each mark from straight on, in good light, with the flywheel “T” mark also in shot. Redundancy is free.
- Note cam lobe direction in the same photo: at TDC-compression the intake and exhaust lobes point away from their valves (both valves closed).
Now those paint marks are your factory marks. When you reassemble, you bring the crank back to TDC-compression, drop the cams so your witness lines realign, and the timing is exactly what the engine had before it came apart. If the previous owner had it wrong, you also now have a stable reference to check against a known-good spec once you source the manual.
Step 3: Install the camshafts and engage the chain without moving anything
Set the intake and exhaust cams so their lobes point away from the valves, both valves closed, at TDC-compression. Then lay the cam chain over the sprockets and the idler gear so it is fully seated with no slack on the tensioner side. The trick is to keep tension on the non-tensioner run of the chain by hand as you seat the cams, so a sprocket cannot jump a tooth while you work.
Leave the cam chain tensioner backed off or removed at this stage. A tensioner pushed home too early takes up slack on the wrong side and quietly pulls a sprocket a tooth over before you have verified anything. Torque the cam caps evenly and to spec so the cams seat true, then check that your witness marks (or the factory marks) still line up before you touch the tensioner.
Step 4: Verify over 2 full crank revolutions before the tensioner goes in
Rotate the engine by hand through 2 full crankshaft revolutions, then bring it back to TDC-compression and check that the cam marks return exactly to their reference. Two turns matters because the camshafts run at half crank speed on a four-stroke, so one complete valve cycle takes two crank revolutions. Checking after a single turn proves nothing.
Turn it by hand only, and turn it in the normal running direction. If you feel a hard stop or rising resistance that is not normal compression, stop immediately. Do not force the bar. Unusual resistance during a slow hand rotation can be a valve touching a piston, which means the timing is out by a tooth or a full stroke. Back off, recheck TDC-compression and lobe direction, and correct before trying again.
When the marks return clean after two turns, then and only then install the cam chain tensioner and release it per the correct procedure so it takes up slack on its own. Recheck the marks one last time after the tensioner is live.
What mistimed cam timing looks and sounds like
Cam timing that is off by a tooth rarely stops the engine dead. It makes it run badly in a specific pattern, and knowing the pattern tells you which way it slipped. Advanced timing (cam ahead of the crank) tends to lift low-end response and kill top end. Retarded timing (cam behind the crank) does the reverse: soft bottom, and it moves the power band up.
| Symptom | Likely cause | What to check |
|---|---|---|
| Rough idle, hunting, won’t hold steady | Cam a tooth off, or timed to exhaust TDC | Rebar to TDC-compression, confirm both valves closed, recheck marks |
| Weak top-end, strong-ish bottom | Cam timing retarded | Cam mark trailing crank reference; move back one tooth |
| Poor bottom-end, peaky up top | Cam timing advanced | Cam mark leading crank reference; move forward one tooth |
| Backfiring through intake or exhaust | Valve opening in the wrong stroke | Confirm compression-stroke TDC, not exhaust TDC |
| Hard stop / rising resistance turning by hand | Possible valve-to-piston contact | Stop. Recheck timing before any further rotation |
| Won’t start at all, good spark and fuel | Off by a full stroke (360 crank degrees) | Re-verify compression vs exhaust TDC |
That last-row warning is why you verify by hand and why the interference question matters. On an interference engine, a mistimed valve can hit the piston and bend. Until that is confirmed, treat it as interference and turn the engine gently.
When to stop and use the OEM shop manual instead
This procedure gets the engine mechanically timed from a known reference. It is not a substitute for the factory Honda shop manual, and there are three things only the manual can give you: the exact factory mark names and positions, the cam cap and sprocket torque figures, and the interference-versus-non-interference answer that sets your risk during hand rotation. Guessing any of those three is how a good rebuild turns into a scrap head.
Stop and get the manual before final assembly if any of these apply: you cannot confirm compression-stroke TDC with confidence, your marks drift over the two-turn check and you cannot find the tooth, or you feel any contact resistance barring the engine over. RFVC heads already have a reputation for cracking around the exhaust valves and for cam and rocker wear, so this is not an engine to force.
For the manual itself, GB250 Clubman and CBX250RS owners typically source scanned factory service manuals through JDM-focused owner communities and vintage-Honda forums, and Japanese-language searches
(GB250 クラブマン サービスマニュアル)surface the original where English reprints do not. The CBX250RS and GB250 share the same basic RFVC top end, so a manual for either covers the cam-drive layout you are working on.
Frequently asked questions
What is the Honda RFVC engine?
RFVC stands for Radial Four Valve Combustion chamber. It is a Honda DOHC design where the four valves splay out radially in a shallow head for high compression and large valve area. In the 250 single it appeared in the XR350R-derived unit, the CBX250RS, and the GB250 Clubman. The RFVC 250 drives its two camshafts through a cam chain and gear arrangement with an anti-backlash sub gear rather than a plain chain-to-both-sprockets loop.
How can you tell if cam timing is out?
The engine runs but runs badly in a pattern: rough or hunting idle, backfiring, and power that has moved to the wrong end of the rev range. Off by a full stroke and it will not start at all despite good spark and fuel. The definitive check is to bar the engine to TDC-compression by hand and confirm the cam marks return to their reference after two full crank revolutions.
What are the symptoms of bad valve timing?
Weak top-end with an off cam suggests retarded timing. Poor bottom-end with a peaky top suggests advanced timing. Backfiring through the intake or exhaust points to a valve opening in the wrong stroke, usually timing set to exhaust TDC instead of compression TDC. Rising resistance when turning the engine by hand can mean a valve is touching a piston.
What does retarding the cam timing do?
Retarding the cam (moving it behind the crank) delays valve events relative to piston position. It generally softens low-end torque and shifts the usable power band higher in the rev range. Overdo it and idle quality and starting suffer. On this engine, a one-tooth error is enough to move the powerband noticeably.
How do you correct cam timing?
Return the crank to confirmed TDC on the compression stroke, back off the cam chain tensioner, and reseat the camshaft(s) so the marks (factory or your own witness marks from TDC) align. Rotate two full crank turns by hand to confirm the marks return exactly, then refit the tensioner and recheck. Correct one tooth at a time and re-verify after each change.
How is valve timing set on a DOHC single?
Set the piston to TDC on the compression stroke, position the cam lobes so both valves are closed, engage the cam chain over the sprockets and idler with slack only on the tensioner side, verify the marks over two crank revolutions, then install and release the tensioner. The crank-to-cam relationship is what you are locking in, so it is the reference you verify, not the chain path alone.